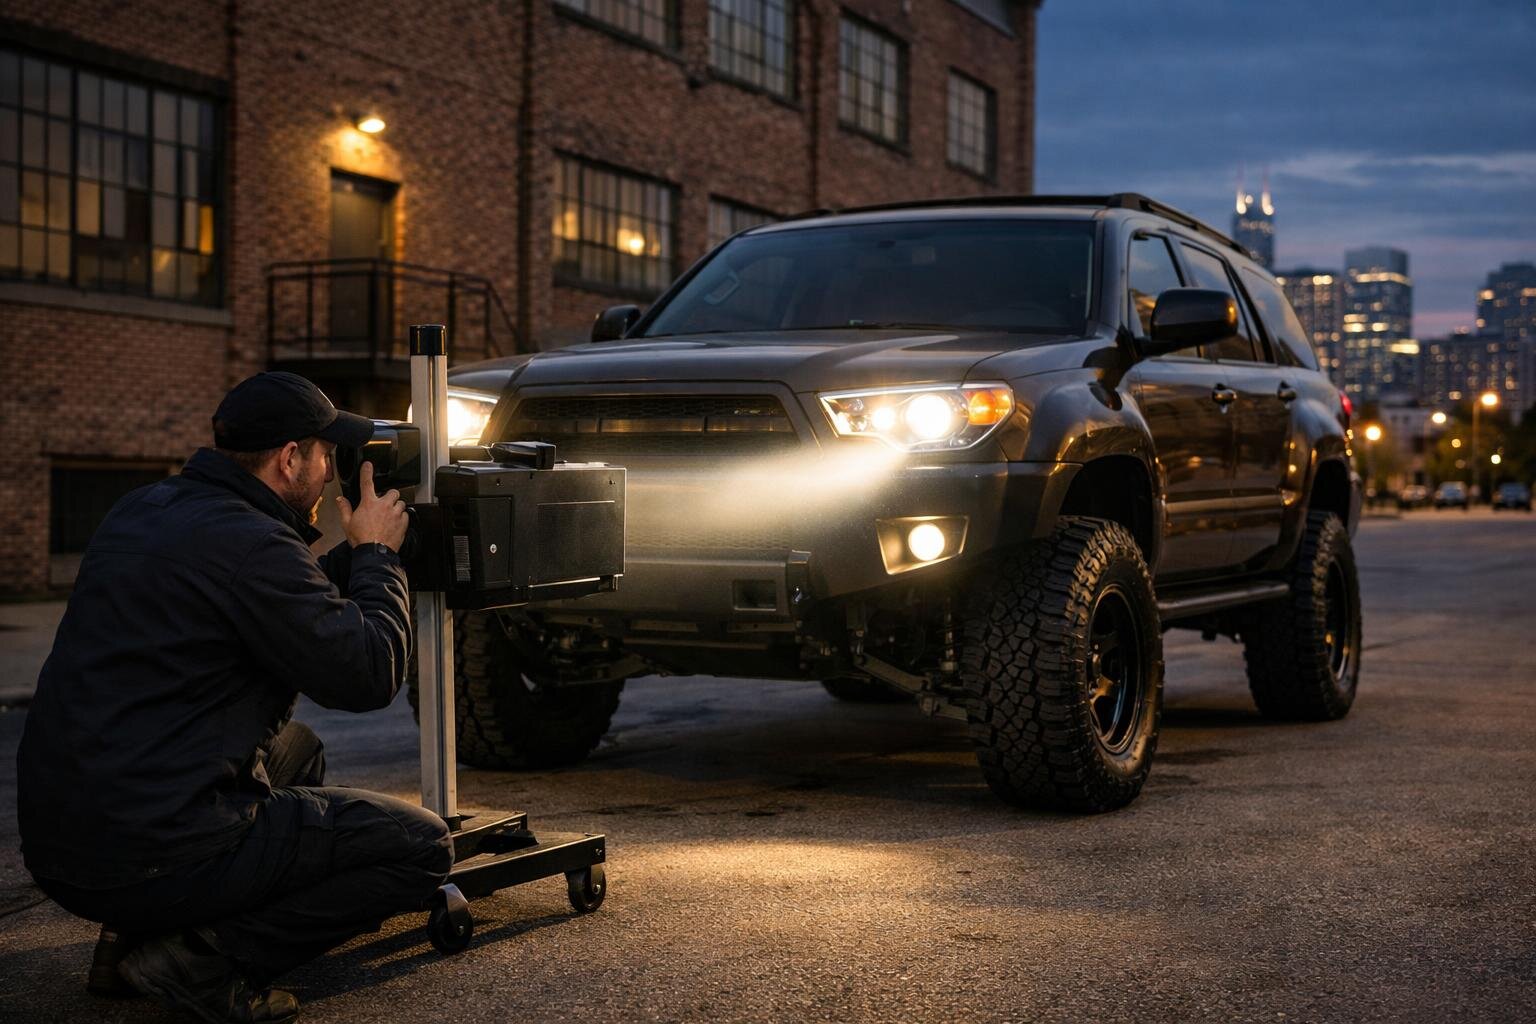
The lift went on. The headlights stayed pointed at someone’s windshield.
Lift kits and leveling spacers are the kind of mod that feels instantly rewarding. The stance looks right, the approach angle gets better, and suddenly your SUV looks like it belongs on a forest service road instead of a Costco parking lot. But there’s a small, unglamorous detail that routinely gets skipped, even by people who do everything else carefully: headlight aim.
If you change ride height, you change where your headlight beams land. That’s not a moral judgment, it’s geometry. Raise the front of a truck or SUV and the lamp housings tilt upward relative to the road. Even a mild leveling kit can do it. The result is predictable: you think you upgraded your night visibility, but what you really did was spray light higher than intended, reducing your own useful downroad illumination while blasting glare into oncoming traffic.
I’m Brian O’Connor, based in Chicago, with an automotive design engineering background and the usual enthusiast weakness for suspension mods that make a vehicle look ready for anything. I also spend enough winter nights here watching traffic crawl through salt spray to notice when lighting is doing more harm than good. A lifted SUV with mis-aimed headlights is one of those problems that’s obvious from half a mile away, and somehow invisible to the person behind the wheel.
Verified context: why this matters beyond “being nice”
Two big, widely trusted sources frame why headlight aim is not just etiquette.
First, the Insurance Institute for Highway Safety (IIHS) evaluates vehicles and publishes ratings that include headlight performance in its broader vehicle ratings program. IIHS has been blunt over the years that headlight performance varies significantly by vehicle and configuration, and their testing focuses on how well headlights illuminate the road without creating excessive glare for other drivers. That last part is the key: good lighting is both “can I see?” and “am I ruining someone else’s ability to see?”
Second, NHTSA’s driver assistance technology overview includes automatic high beams among the mainstream technologies now common on new vehicles. Automatic high beams can be helpful, but they are not magic. If your low beams are aimed too high because you changed suspension height, you have effectively created “always-on glare,” even before high beams enter the conversation. And if your vehicle has cameras or sensors used for driver assistance features, it’s another reminder that modern vehicles assume certain factory alignments and angles.
No, a lift kit does not automatically break driver assistance features, and I’m not going to claim it does without vehicle-specific evidence. But it should make you think like an engineer: when you change angles and heights, you should verify what those angles affect.
How lifting changes lighting (it really is just angles)
A headlamp assembly is mounted to the body structure. The beam pattern is designed around a specific mounting height and pitch angle so that the cutoff line (on many modern low beams) lands where it should on level ground.
When you lift or level a vehicle, you change static ride height. Depending on what you installed and how it settles, you can also change rake (the front-to-rear attitude). A front leveling kit often raises the nose more than the tail; a full suspension lift may raise both ends but still alter rake depending on spring rates, added weight (bumpers, winches), and alignment settings.
Now picture what happens at night on a typical Chicago street with uneven pavement and crown in the lane. If your baseline aim is already high, every bump becomes a flashbulb effect for everyone else. It’s not that your lights are “bright.” It’s that they’re pointed wrong.
There’s another twist enthusiasts don’t always expect: mis-aim can hurt your own visibility. If too much light goes above the intended cutoff, you can lose contrast on the road surface where it matters most. You also increase backscatter in rain or snow because more light is thrown into precipitation instead of onto pavement. Anyone who has driven Lake Shore Drive in wet snow knows exactly how miserable scattered light can get.
Common symptoms of bad aim after a lift
You don’t need lab equipment to suspect something’s off. A few real-world tells show up quickly after ride height changes:
Oncoming drivers flash their high beams at you. This is the classic sign. It’s not definitive proof because some people flash at anything bright or new-looking, especially with modern LED optics. But if it happens repeatedly after your lift or level install, don’t ignore it.
Road signs look like they’re being spotlighted from far away. Retroreflective signs will light up aggressively when your beam is aimed high. That feels impressive at first. It’s also a hint that your beam is wasting output above where it helps you see hazards.
You feel like you’re driving in a tunnel of glare during rain or snow. Some of that is unavoidable in bad weather, but poor aim makes it worse by throwing more light into droplets close to your line of sight.
Your low beams seem “short” on actual pavement even though everything ahead looks bright. That sounds contradictory until you’ve experienced it: lots of light up high, not enough usable illumination placed where tires actually go.
The temptation: “I’ll just crank them down”
The internet loves a quick fix: find the adjustment screw, twist until it looks better against a garage door, call it done. Sometimes that works out okay; often it doesn’t. The problem isn’t that adjusting aim is inherently unsafe. The problem is false precision and missing context.
Aim depends on vehicle load (cargo area full or empty), tire pressure, whether suspension components have settled after installation, and whether alignment was performed after changing suspension geometry. Even something as basic as parking on slightly sloped pavement can fool your eyes when you’re using a wall as reference.
Also, modern headlamps vary wildly in how they create their beam pattern. Some have sharp cutoffs; others blend gradually; some incorporate adaptive behavior depending on steering angle or speed; some pair low beams with separate fog lamps that people mistakenly use as “extra low beam.” Without getting too deep into proprietary designs, the point is simple: “looks okay to me” isn’t always okay to everyone else sharing the road with you.
What to check right after the suspension install
This is where I get picky in an engineer way because order matters. If you want responsible results without sketchy shortcuts, treat headlight aim as an endpoint check after your ride height change has stabilized.
1) Let the suspension settle (within reason).
New springs can settle slightly; newly installed components may seat; bushings may relax into their new neutral position after some driving. I’m not going to invent a universal mileage number because it varies by parts and vehicle condition. The practical advice is to avoid aiming lights five minutes after dropping the truck off jack stands unless you plan to recheck later.
2) Confirm tire pressures and tire size changes.
All-terrain tires are common with lifts. Tire diameter changes affect ride height and pitch too. Uneven pressures side-to-side can tilt aim left or right slightly; larger tires can subtly raise everything again versus stock assumptions.
3) Get an alignment if your suspension geometry changed.
Alignment does not directly set headlight aim, but it’s part of making sure your lift install is actually finished rather than “assembled.” A truck that wanders or sits oddly because something isn’t centered can end up with inconsistent pitch under braking and acceleration too.
4) Check for load-induced squat.
If you added heavier accessories up front (steel bumper, winch) or carry tools in back all week, your static rake may be different than stock. That changes aim again. This is one reason factory setups are conservative: they assume typical loads and typical attitudes. Your build might not be typical anymore.
A responsible adjustment path that doesn’t guess at numbers
The safe endpoint is simple: have headlight aim checked professionally using proper aiming equipment or procedures specified for your vehicle and lamp type. Most dealerships can do this; many independent shops can too; some body shops are particularly familiar because they deal with lamp replacement and collision repairs where aim must be verified afterward.
I know that answer isn’t as fun as turning screws in your driveway with a beverage nearby. But there are good reasons to treat this like alignment rather than like styling:
Professional aiming reduces guesswork. Proper equipment accounts for reference points and beam patterns more consistently than eyeballing against a wall on questionable pavement.
You avoid chasing symptoms instead of fixing causes. If your vehicle sits nose-high because of how the lift was configured or because rear springs sagged with load, aiming headlights down might mask a bigger setup issue while creating other compromises in how far ahead you can see.
You keep automatic high beams from becoming part of the problem. NHTSA lists automatic high beams among common driver assistance technologies now available across many vehicles. If low-beam aim starts from an incorrect baseline, automation cannot fully compensate for glare concerns because low-beam glare is still glare when aimed wrong.
If you do any preliminary checks at home between shop visits (which I get), keep them conservative: verify nothing is obviously skyward; recheck after carrying cargo; don’t assume one adjustment fits all builds; don’t modify lighting systems in ways that violate local regulations or defeat safety intent. And if your vehicle uses advanced lighting features (adaptive headlights or camera-based systems), consult service information rather than guessing which screw does what.
The real results people notice once aim is corrected
This is one of those fixes that doesn’t photograph well but feels immediately better at night.
You stop getting flashed by oncoming traffic. That alone lowers stress levels on dark commutes because getting flashed over and over makes you feel like the villain even when you thought you were improving your build responsibly.
The road surface becomes clearer instead of just “brighter.” Correct aim puts more usable light where lane lines, potholes, debris, and pedestrians actually appear first: on pavement within your stopping distance envelope rather than up in tree branches and rear windows ahead of you.
Your lights behave more predictably over bumps and crests. You still get some motion because suspensions move; that’s normal. But properly aimed lamps reduce those accidental bursts of glare that happen when an already-high beam gets kicked upward by uneven pavement.
Your upgrade feels complete instead of half-finished. This sounds emotional because it is. A lift kit changes how your SUV looks and how it clears obstacles; correct headlight aim changes how confident you feel driving home from an evening meet or heading out before dawn for a trail day without feeling like you’re punishing everyone else on I-90.
The annoying challenges nobody mentions at checkout
A few practical headaches come with doing this correctly:
You might need two rounds of checks. Install first, then recheck after some settling or after adding accessories (roof rack load-outs count too). It’s mildly frustrating because nobody wants extra appointments after spending real money on suspension parts and labor.
Some shops treat aiming as an afterthought unless you ask explicitly. Suspension installers focus on torque specs and alignment angles; lighting often falls outside their default checklist. You may need to request headlight aim verification specifically when booking service so time gets allocated properly.
Aftermarket bulbs or housings complicate things fast. I’m not going to give advice on illegal modifications or tell anyone to run noncompliant lighting equipment. The reality is that swapping bulbs or housings changes beam pattern characteristics; even perfect vertical aim cannot fix a poor optical design that produces uncontrolled glare. If you want better lighting performance responsibly, start by making sure what you have is aimed correctly before changing hardware again.
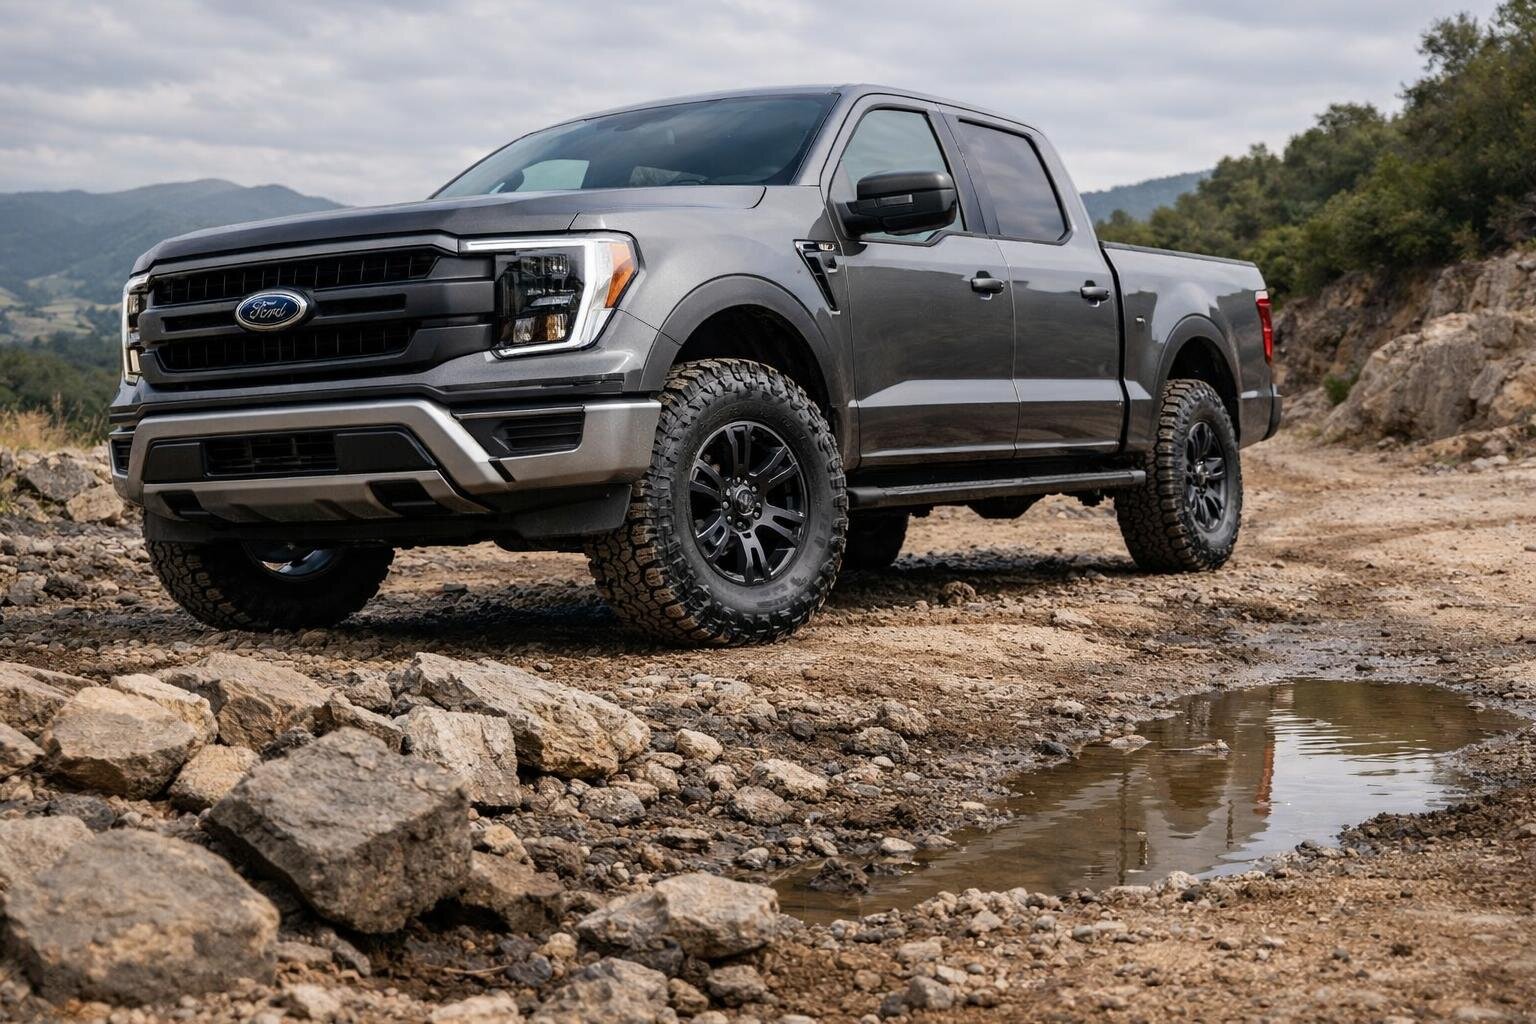
A quick word about competitors: who else gets affected?
This topic isn’t brand-specific because physics doesn’t care whether you drive a Toyota 4Runner, Jeep Wrangler, Ford Bronco, Chevy Tahoe/Suburban class SUV, or any lifted crossover someone decided to build into an overland rig. Those models compete in different segments and price bands depending on year and trim (and I’m intentionally not inventing specs here). What they share is height sensitivity: any change in static attitude shifts beam direction enough to matter in traffic-heavy areas like Chicagoland suburbs where two-lane roads mix commuters with cyclists and pedestrians near crosswalks.
The takeaway I wish every lift kit came with
If you lift or level your SUV or truck, checking headlight aim should be treated like torquing lug nuts after installing wheels: basic responsibility that protects both performance and safety. It helps you see better at night in typical daily use, reduces glare for other drivers, and keeps modern lighting behavior closer to what engineers intended when they designed the beam pattern in the first place.
The funny part is how small the adjustment can be relative to how big the difference feels from behind the wheel. Your lifted stance can stay aggressive without turning every night drive into an unintended light show for everyone else. Get the suspension sorted, then finish the job with a professional headlight aim check so your upgrade looks right and drives right when the sun goes down.
0 comments
Join the discussion around this article.
Please login to comment.