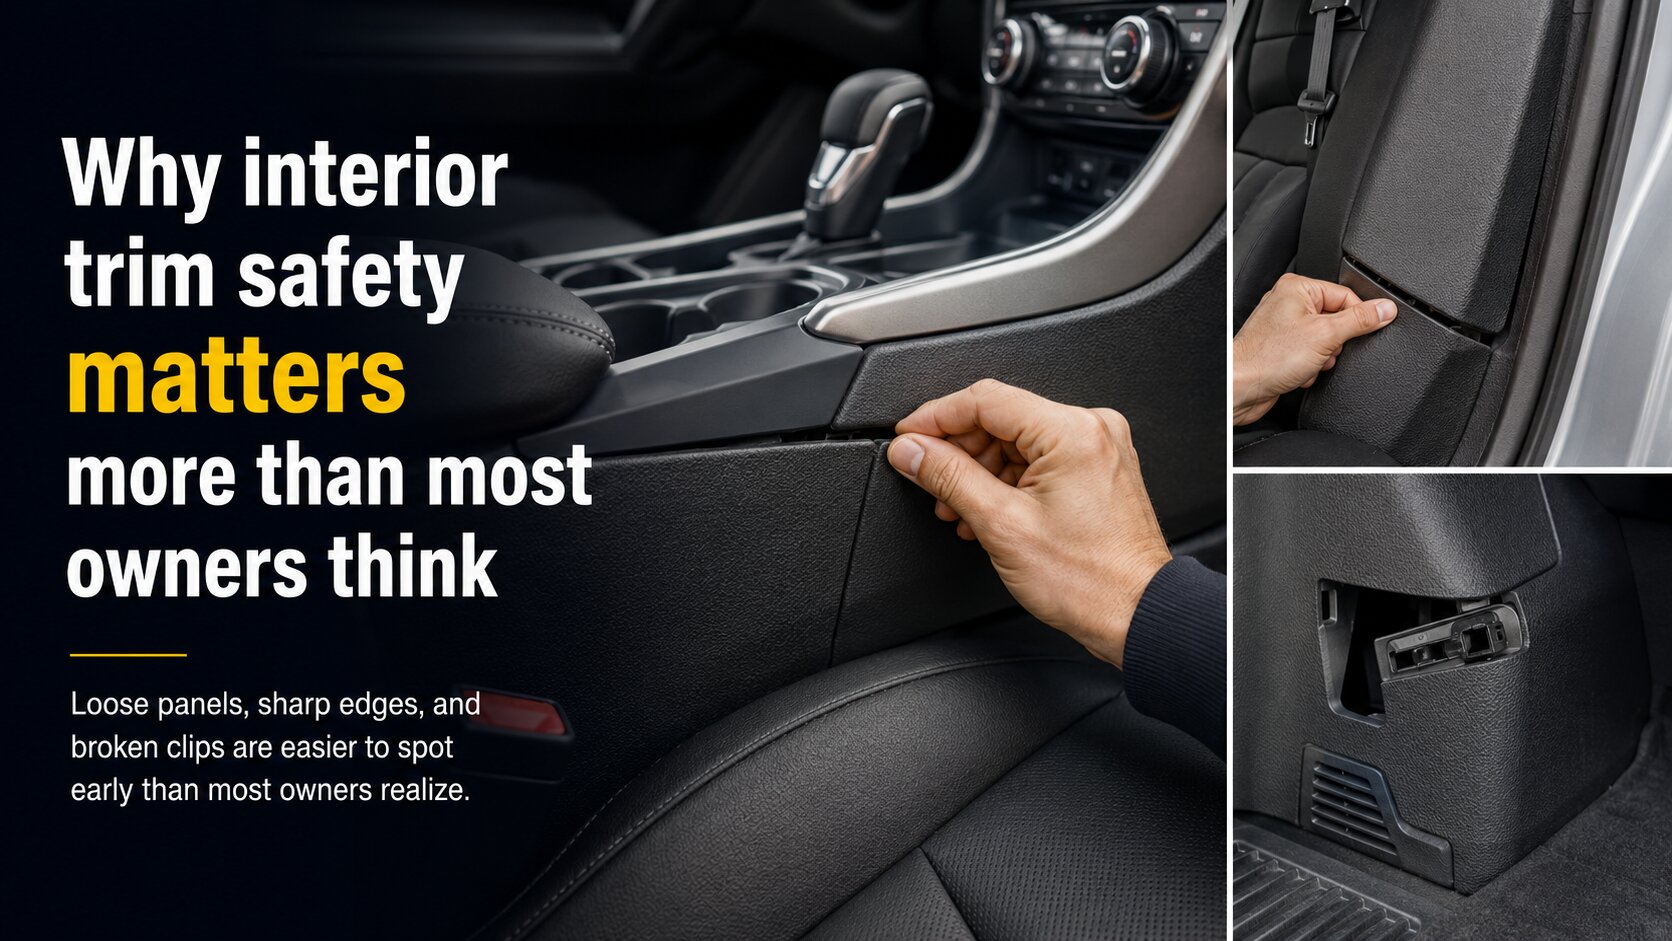
Why interior trim safety matters more than most owners think
Most owners check tires, wiper blades, and exterior lights. Almost nobody checks the cabin for sharp trim edges, loose panels, or broken clips until something pinches a finger, scrapes a shin, or rattles loudly enough to be impossible to ignore. The frustrating part is that interior issues are often simple to spot early, and they can affect more than comfort. A loose center console side panel can interfere with a seat belt buckle’s path. A broken rear seat plastic cover can expose a sharp edge right where a child swings their feet. A cargo area panel that no longer sits flush can become a snag point for bags, pet leashes, or fingers when you are loading groceries in a hurry.
This guide is an owner safe inspection. No cutting, sanding, glue hacks, or improvised repairs. The goal is to identify problems early, document them clearly, and choose the right next step: re seating a panel correctly, replacing a clip with the correct part, or having a dealer or independent shop address it.
Verified facts and context: what commonly causes loose panels and broken clips
Across mainstream U.S. market vehicles, interior panels are typically held by a mix of hidden spring clips, plastic push pins, screws (often Torx), and locating tabs. Automakers use these methods because they are fast on the assembly line and reduce squeaks when everything is properly seated. The tradeoff is that clips can fatigue with repeated removal, plastics can become brittle with heat cycling (especially in sun belt climates), and panels can shift after minor impacts or after accessory installation (dash cams, audio work, alarm systems, trailer brake controllers in trucks).
It is also common for vehicles to share underlying architectures across multiple model lines from the same manufacturer. That means similar clip designs show up in compact crossovers, midsize sedans, and even some trucks within a brand family. Competitors in the same segment often use similar fastening strategies too. A Toyota RAV4 class crossover competes with vehicles like the Honda CR V and Mazda CX 5; while their interiors differ in layout and materials, clip retained trim panels are common across all three. The specific clip part numbers vary by model year and trim, so this article avoids model specific claims and focuses on inspection points you can apply to almost any vehicle.
If you want vehicle specific repair steps or torque values for fasteners, use the factory service information for your exact year and model (or a reputable repair database). Owner’s manuals rarely include interior trim removal procedures for good reason; improper removal is how many clips break in the first place.
Tools you can use safely (and what to avoid)
You do not need specialty tools to inspect interior trim safely. A small flashlight helps. A microfiber cloth is useful for wiping dust so you can see panel gaps clearly. Your hands do most of the work.
Avoid prying with screwdrivers or metal picks during an inspection. Avoid pushing hard near airbags or seat belt anchors. Also avoid forcing any panel that resists movement; resistance usually means there is still a fastener engaged or the panel is designed not to move in that direction.
Start where people touch: child and passenger contact points
The most important areas are not always the noisiest ones. Focus first on places where skin meets plastic: door armrests, lower door pockets, B pillar trim near rear seat passengers, seat belt buckle surrounds, and any exposed edges near footwells.
Run your hand lightly along panel edges. You are feeling for burr like sharpness, corners that have lifted away from their mating surface, and panels that flex more than expected. Many interiors use textured plastics that can feel “sharp” even when intact; what you are looking for is an edge that catches fabric or feels like it could scrape skin.
If you routinely carry kids in boosters or car seats, pay attention to where feet kick during entry and exit. Rear door sills and lower B pillar trim take constant abuse from shoes. Those areas also tend to hide broken retaining clips because they can look fine until you press on them.
Center console trim: small gaps that can become big annoyances
The center console is a high contact zone: knees brush it, elbows rest on it, phones slide around it. It also houses wiring for USB ports, 12 volt outlets, wireless charging pads (if equipped), electronic shifters on many newer vehicles, drive mode selectors on some models, and sometimes parking brake switches.
Inspection steps:
1) Check both sides of the console where it meets the carpet or lower dash panels. Look for uneven gaps left to right. A gap that grows over time often indicates one or more clips has disengaged.
2) Press gently along the panel face with open fingers rather than fingertips. You want to feel whether it clicks back into place cleanly or whether it floats loosely.
3) Inspect around cupholders and storage bins for sharp edges created by cracked trim rings or broken hinged lids.
4) If your vehicle has an electronic shifter or push button gear selector, do not probe around the mechanism. Just check surrounding trim fitment. Any binding feel in adjacent pieces should be addressed by a professional because wiring harness routing and switch alignment matter.
Why this matters beyond comfort: Loose console panels can create persistent squeaks and rattles that many owners misdiagnose as suspension noise. They can also stress wiring connectors if the panel moves enough to tug on harnesses behind it. That does not automatically mean electrical failure is imminent, but intermittent USB charging complaints sometimes trace back to loose connectors after repeated movement.
Seat rails and under seat covers: pinch points hiding in plain sight
Seat rails are structural components bolted to the floorpan. They guide fore aft movement on manual seats and support motorized tracks on power seats. Around those rails you will often find plastic covers designed to keep debris out of mechanisms and improve appearance.
Inspection steps:
1) Slide the front seats through their full range of travel if safe to do so (engine off is fine). Listen for scraping sounds that could indicate a loose cover contacting the rail.
2) Look at the inner rail area near the center console as well as the outer rail near the door sill. The inner side often sees more shoe contact during entry.
3) Check for missing end caps on rails. A missing cap can leave an edge that catches pant legs or skin when someone reaches under the seat for a dropped item.
4) Avoid reaching near yellow connectors under seats. Yellow wiring looms typically indicate airbag system components (such as seat mounted side airbags or occupant detection). You do not need to touch them for this inspection.
Why this matters: Loose under seat trim can become a pinch hazard when seats move electrically. It can also interfere with airflow for rear HVAC ducts routed under front seats on some vehicles depending on configuration.
Rear seat plastic covers: where family use finds every weak clip
The rear seat area sees high wear from car seats, strollers banging into seatbacks during loading, sports gear sliding across cushions, and passengers stepping on things they should not step on.
Key areas:
Seat hinge covers on folding rear seats often use small tabs and clips because they need clearance when the seatback folds. If one breaks, the cover may hang slightly open.
LATCH anchor access points are another common trouble spot because parents remove plastic covers repeatedly when installing child seats. If a cover no longer stays shut or sits proud of the upholstery line, treat it as more than cosmetic; exposed edges around anchors can be uncomfortable against hands during installation.
Inspection steps:
1) With rear doors open, look at both ends of the rear bench where plastic meets upholstery near hinge points.
2) Fold seatbacks if your vehicle allows it easily (some require headrest adjustment). Watch how trim pieces move during folding; they should clear without catching.
3) Check any hard plastic seatback panels (common in some crossovers and wagons). These panels protect upholstery when carrying cargo but can crack if overloaded items press into them.
Cargo area side panels and floor boards: quiet problems that show up at highway speed
Cargo areas hide spare tires (or inflator kits), battery access in hybrids and EVs depending on design, subwoofers in some audio packages, tie down points, and sometimes third row latch hardware in larger SUVs.
A panel that is slightly out of position may not seem like a safety issue until you consider how owners actually use cargo space: quick loading at night in parking lots; reaching past bags; pets jumping in; heavy coolers sliding forward under braking.
Inspection steps:
1) Remove loose items so you can see panel seams clearly.
2) Check floor boards for proper seating at their edges. If your cargo floor has multiple height positions depending on model design, confirm it sits flat in each intended position rather than rocking on one corner.
3) Press gently on side panels near tie down hooks and 12 volt outlets if equipped. These zones often have cutouts that reduce stiffness; broken clips show up there first as flexing or buzzing over bumps.
4) Inspect around liftgate latch striker covers if present; these are frequently bumped by cargo corners.
If you hear rattles mainly at highway speed on coarse pavement but cannot reproduce them by hand at idle, cargo area panels are still worth checking because vibration frequency matters. A slightly loose clip may only buzz at certain road inputs.
What “sharp” really means in modern interiors
Modern cabins mix soft touch materials with hard structural plastics underneath. Sharpness usually comes from one of three sources: cracked plastic exposing an edge; a panel separating so its thin lip becomes exposed; or missing trim pieces leaving a metal bracket edge accessible (less common but possible around seats).
If you find an edge that feels genuinely sharp enough to cut skin or snag clothing easily, treat it as a priority item even if it seems minor visually. This is especially true near passenger egress paths such as door sills and seat sides where people brace themselves while stepping out.
No improvised repairs: what to do instead
If a panel simply popped out but all clips appear intact and nothing resists alignment, gentle re seating may be appropriate. If anything feels misaligned or requires force, stop there.
If you suspect broken clips:
Document with photos in good light from multiple angles showing panel gaps and any missing pieces.
Check whether your vehicle is still under bumper to bumper warranty (terms vary by brand and year). Interior fitment issues may be covered depending on cause; wear items may not be.
If out of warranty, an independent shop experienced with interior work can often replace clips cleanly using OEM parts without trial and error damage. Body shops also handle interior trim regularly because they remove panels during collision repairs.
Avoid adhesives unless specified by an OEM procedure for your exact model; glue can make later proper repairs harder and may create new rattles when it hardens unevenly.
A quick note about safety systems nearby
Certain interior panels sit near airbags: steering wheel and dash areas for front airbags; A pillar trims for curtain airbags; seat side bolsters for side airbags depending on design; headliner edges above doors for curtains; B pillar trims near belt height adjusters depending on vehicle layout.
This guide stays away from removal steps intentionally. If loose trim is located near airbag marked areas (look for “SRS” labels), schedule professional service rather than experimenting at home. Airbag modules and their tethering strategies are engineered as systems; correct clip types and proper seating matter more there than anywhere else inside the cabin.
Create a repeatable routine: five minutes every few months
You do not need to obsess over cabin gaps like a concours judge. A simple routine works:
Every oil change interval for gasoline vehicles (or every few months for EV owners who visit service less often), do one lap around cabin touch points: console sides; front seat rails; rear hinge covers; door sills; cargo side panels. Press lightly where passengers kick or lean most often.
If you live where summers are hot or winters are severe, expect plastics to creak more during temperature swings. That does not automatically mean something is broken; it does mean small fit issues show up sooner if clips were marginal from prior removal or assembly variation.
The ownership payoff: fewer rattles now, fewer hassles later
A tight interior does more than feel nicer day to day. It reduces distraction from noise over rough pavement and keeps small hazards away from hands and legs during normal use. It also preserves resale presentation because buyers notice missing covers quickly when they sit down and start opening compartments.
The best part is that most of this check requires no tools at all; just attention where your passengers actually live inside the vehicle. That kind of practical awareness tends to pay off long after the new car smell fades.


0 comments
Join the discussion around this article.
Please login to comment.